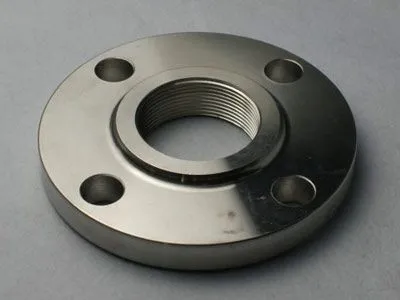
What are the test procedures for a Lap Joint Flange pressure test?
As a seasoned supplier of Lap Joint Flanges, I understand the critical importance of ensuring the quality and reliability of these essential components. A pressure test is a fundamental step in the quality control process, which helps to verify the integrity of the flange and its ability to withstand the intended operating pressures. In this blog post, I will share the detailed test procedures for a Lap Joint Flange pressure test, providing valuable insights for both industry professionals and those interested in understanding the manufacturing and testing processes.
Pre - test Preparation
Before initiating the pressure test, thorough preparation is required to ensure accurate and reliable results.
Inspection of the Flange
First and foremost, a visual inspection of the Lap Joint Flange is carried out. Check for any visible defects such as cracks, porosity, or surface irregularities. Measure the key dimensions of the flange, including the outer diameter, inner diameter, thickness, and bolt hole size, to ensure they comply with the relevant standards and specifications. For instance, the ASME B16.5 standard provides detailed dimensional requirements for flanges in the United States.
Selection of Testing Equipment
Select appropriate testing equipment, including a pressure source (such as a hydraulic pump), pressure gauges, and a test fixture. The pressure source should be capable of generating the required test pressure accurately. Pressure gauges with a suitable range and accuracy should be calibrated regularly to ensure reliable readings. The test fixture should be designed to securely hold the Lap Joint Flange in place during the test and prevent any leakage from the connections.
Cleaning and Assembly
Clean the Lap Joint Flange thoroughly to remove any dirt, debris, or contaminants that could affect the test results. Assemble the flange with the appropriate gasket and bolts according to the recommended torque values. Proper assembly is crucial to ensure a tight seal and prevent leakage during the pressure test.
Test Setup
Once the pre - test preparation is complete, it's time to set up the test.
Installation of the Flange in the Test Fixture
Carefully install the Lap Joint Flange in the test fixture, ensuring that it is properly aligned and centered. Tighten the bolts evenly to the specified torque values to create a uniform seal.
Connection of Testing Equipment
Connect the pressure source to the test fixture using appropriate hoses or pipes. Install the pressure gauge at a location where it can accurately measure the pressure inside the test system. Make sure all connections are secure and leak - free.
Filling the Test System
Fill the test system with a suitable test medium, typically water or oil. The test medium should be free of air bubbles, as air bubbles can cause inaccurate pressure readings and affect the test results. To remove air bubbles, slowly fill the system and allow the medium to circulate for a few minutes.
Pressure Testing
The actual pressure testing process consists of several stages.
Initial Pressure Check
Gradually increase the pressure to a low initial value, usually around 10% of the test pressure. Hold this pressure for a few minutes and check for any visible leaks or abnormal pressure drops. If any leaks are detected, stop the test immediately, identify the source of the leak, and take corrective actions.
Ramping up the Pressure
If the initial pressure check is successful, gradually increase the pressure to the test pressure at a controlled rate. The rate of pressure increase should be in accordance with the relevant standards or specifications. For example, a common rate is around 10% of the test pressure per minute.
Holding the Test Pressure
Once the test pressure is reached, hold it for a specified period, typically 10 - 30 minutes. During this time, closely monitor the pressure gauge and check for any signs of leakage, such as visible drips or pressure drops. Any significant pressure drop may indicate a leak in the flange or its connections.
Pressure Release
After the holding period, slowly release the pressure at a controlled rate. Do not release the pressure too quickly, as this can cause damage to the flange or the testing equipment.
Post - test Inspection
After the pressure test is completed, conduct a post - test inspection.
Visual Inspection
Inspect the Lap Joint Flange again for any signs of damage or deformation that may have occurred during the test. Check the gasket for any signs of extrusion or damage.
Measurement of Final Dimensions
Measure the key dimensions of the flange again to ensure that they have not changed significantly during the test. Any significant dimensional changes may indicate that the flange has been over - stressed or damaged.
Special Considerations for Different Applications
In some applications, additional considerations may be required during the pressure test.
High - Temperature Applications
For Lap Joint Flanges used in high - temperature applications, the pressure test may need to be conducted at an elevated temperature to simulate the actual operating conditions. Special care should be taken to ensure the safety of the testing personnel and the integrity of the testing equipment at high temperatures.
Corrosive Environments
If the flange is intended for use in a corrosive environment, the test medium may need to be selected to simulate the corrosive conditions. This can help to identify any potential corrosion - related issues before the flange is put into service.
Related Flange Types
In addition to Lap Joint Flanges, we also supply other types of flanges, such as Orifice Flange Facing, Long Welding Neck Flange, and Carbon Steel Threaded Flange. Each type of flange has its own unique characteristics and applications, and the pressure test procedures may vary slightly depending on the design and material of the flange.
Conclusion
The pressure test is a crucial step in ensuring the quality and reliability of Lap Joint Flanges. By following the proper test procedures, including pre - test preparation, test setup, pressure testing, and post - test inspection, we can identify any potential issues and ensure that the flanges meet the required standards and specifications.


If you are in the market for high - quality Lap Joint Flanges or other types of flanges, I encourage you to reach out for a procurement discussion. We are committed to providing you with the best products and services to meet your specific needs.
References
- ASME B16.5 Standard for Pipe Flanges and Flanged Fittings
- Industry best practices for flange pressure testing