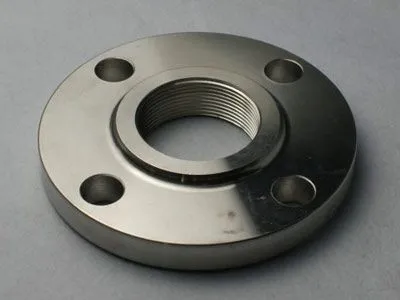
A blind flange is a crucial component in many piping systems, used to seal the end of a pipe or valve. Over time, these flanges can become damaged due to various factors such as corrosion, mechanical stress, or improper installation. As a Blind Flange supplier, I understand the importance of being able to repair damaged flanges effectively. In this blog post, I will share some valuable insights on how to repair a damaged blind flange.
Identifying the Damage
The first step in repairing a damaged blind flange is to accurately identify the type and extent of the damage. Common types of damage include cracks, pitting, warping, and gasket surface damage. Cracks can occur due to excessive stress or thermal cycling, while pitting is often caused by corrosion. Warping may result from uneven tightening or exposure to high temperatures. Gasket surface damage can lead to leaks and reduced sealing performance.


Visual inspection is the most basic method for identifying damage. Look for visible cracks, pits, or signs of deformation on the flange surface. Use a magnifying glass if necessary to detect small cracks or surface irregularities. Measuring the flange's dimensions with a caliper or micrometer can also help identify warping or distortion. Additionally, non - destructive testing methods such as ultrasonic testing or magnetic particle testing can be used to detect internal cracks that may not be visible to the naked eye.
Preparation for Repair
Once the damage has been identified, it's time to prepare for the repair process. First, gather all the necessary tools and materials. You will typically need a grinder, welding equipment (if welding is required), sandpaper, gasket material, and appropriate cleaning agents. Make sure the tools are in good working condition and that you have the correct safety equipment, such as gloves, goggles, and a welding helmet.
Next, isolate the flange from the piping system. This may involve shutting off valves, draining the system, and relieving any pressure. Ensure that the area around the flange is clean and free from any debris or contaminants that could interfere with the repair process. Mark the flange and the adjacent pipes to ensure proper alignment during reassembly.
Repairing Minor Surface Damage
If the damage is minor, such as surface pitting or minor scratches on the gasket surface, it can often be repaired by grinding and smoothing the affected area. Use a grinder with a fine - grit wheel to remove the damaged material gently. Be careful not to over - grind, as this can change the dimensions of the flange and affect its performance. After grinding, use sandpaper to smooth the surface further and remove any rough edges.
Once the surface is smooth, clean it thoroughly with a degreaser to remove any metal particles or contaminants. This will ensure a good seal when the new gasket is installed. If the damage is limited to the gasket surface, you may also consider using a gasket dressing to improve the sealing performance.
Welding Repairs
For more severe damage, such as cracks, welding may be required. However, welding a blind flange should be done with caution, as improper welding can lead to further damage or weaken the flange. Before welding, it's important to pre - heat the flange to reduce the risk of cracking during the welding process. The pre - heating temperature will depend on the material of the flange, but it is typically in the range of 100 - 200°C.
Use a welding process that is suitable for the flange material, such as shielded metal arc welding (SMAW) or gas tungsten arc welding (GTAW). Make sure to follow the welding procedures and specifications recommended for the specific material. When welding a crack, start by grinding a V - shaped groove along the crack to ensure good penetration. Fill the groove with weld metal in multiple passes, allowing each pass to cool before adding the next one.
After welding, perform a post - weld heat treatment to relieve any residual stresses in the flange. This can help prevent future cracking and improve the overall strength of the repair. Once the heat treatment is complete, inspect the welded area for any signs of defects, such as porosity or lack of fusion. Use non - destructive testing methods if necessary to ensure the quality of the weld.
Reassembling the Flange
Once the repair is complete, it's time to reassemble the flange. Clean the mating surfaces of the flange and the adjacent pipes to remove any debris or contaminants. Apply a thin layer of anti - seize compound to the bolt threads to prevent galling and make future disassembly easier.
Install a new gasket on the flange. Make sure the gasket is the correct size and material for the application. Align the flange with the adjacent pipe and insert the bolts. Tighten the bolts evenly in a cross - pattern to ensure uniform compression of the gasket. Use a torque wrench to tighten the bolts to the recommended torque value, which can usually be found in the flange manufacturer's specifications.
Testing the Repaired Flange
After reassembling the flange, it's important to test it to ensure that the repair was successful. Pressure testing is the most common method for testing a repaired flange. Slowly increase the pressure in the piping system to the operating pressure and hold it for a specified period of time. Check for any signs of leaks around the flange, such as dripping or hissing sounds.
If a leak is detected, immediately shut off the pressure and inspect the flange to identify the source of the leak. It may be necessary to retighten the bolts or replace the gasket. Once the leak is fixed, repeat the pressure testing until the flange passes the test.
Conclusion
Repairing a damaged blind flange requires careful inspection, proper preparation, and the use of appropriate repair techniques. As a Blind Flange supplier, I recommend following the manufacturer's guidelines and industry best practices to ensure a successful repair. If you are unsure about any aspect of the repair process, it's always a good idea to consult with a professional.
If you are in need of high - quality Blind Flanges or have any questions about flange repair, please feel free to contact us for more information and to discuss your procurement needs. We are committed to providing the best products and services to meet your requirements.
References
- ASME B16.5 - Pipe Flanges and Flanged Fittings
- API 6A - Specification for Wellhead and Christmas Tree Equipment
- AWS D1.1 - Structural Welding Code - Steel
Note: The links are inserted as follows:
In the above blog, you can insert these links at appropriate places, for example:
- "As a Blind Flange supplier, I understand the importance of being able to repair damaged flanges effectively."
- "For other types of flanges in our product range, such as Long Welding Neck Flange and Orifice Flange Facing, we also offer professional advice on their maintenance and repair."