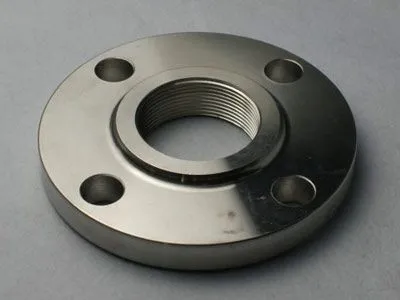
Hey there! As a supplier of Slip On Flanges, I often get asked about how to weld a Slip On Flange to a pipe. It's a crucial process, and getting it right ensures a strong and reliable connection. In this blog, I'll walk you through the steps of welding a Slip On Flange to a pipe, so let's dive in!
Understanding Slip On Flanges
First off, let's talk a bit about Slip On Flanges. These flanges are designed to slide over the end of a pipe and are then welded in place. They're a popular choice because they're relatively easy to install and provide a good seal. Slip On Flanges are commonly used in low-pressure applications, but they can also handle higher pressures with the right welding and installation.
Preparing for Welding
Before you start welding, you need to make sure you have all the right tools and materials. Here's what you'll need:
- Slip On Flange: Of course, you'll need the right size and type of Slip On Flange for your pipe. Make sure it's in good condition and free of any defects.
- Pipe: The pipe should be clean, straight, and cut to the correct length. You can use different types of pipes, such as ERW Pipes or Large Size Spiral Welded Pipe, depending on your application.
- Welding Machine: Choose a welding machine that's suitable for the type of welding you'll be doing. For most Slip On Flange welding, a MIG or TIG welder will work well.
- Welding Rods or Wire: Select the appropriate welding rods or wire for the material of your flange and pipe. Make sure they're compatible to ensure a strong weld.
- Safety Gear: This includes welding gloves, a welding helmet, safety glasses, and a fire-resistant jacket. Safety should always be your top priority when welding.
Cleaning the Pipe and Flange
Once you have all your tools and materials, it's time to clean the pipe and flange. Use a wire brush or sandpaper to remove any rust, dirt, or debris from the surfaces that will be welded. This will help ensure a good weld and prevent any contaminants from getting into the weld.
Fitting the Flange onto the Pipe
Next, slide the Slip On Flange onto the end of the pipe. Make sure it fits snugly and is centered properly. You can use a level or a straightedge to check for alignment. If the flange is not centered, it can cause stress on the weld and lead to leaks or failures.
Tack Welding
Tack welding is an important step in the process. It helps hold the flange in place while you do the final welding. Use your welding machine to make a few small welds around the circumference of the flange. These tack welds should be evenly spaced and about 1/4 to 1/2 inch long. Make sure the tack welds are strong enough to hold the flange in place but not so large that they make it difficult to do the final welding.
Final Welding
Now it's time for the final welding. There are two main types of welds you can use for Slip On Flanges: fillet welds and full penetration welds.
- Fillet Welds: Fillet welds are the most common type of weld for Slip On Flanges. They're relatively easy to do and provide a good seal. To make a fillet weld, start at one end of the flange and weld along the joint between the flange and the pipe. Use a steady, even motion and keep the welding arc at the correct distance from the work surface. Make sure to fill the joint completely with weld metal.
- Full Penetration Welds: Full penetration welds are stronger than fillet welds but are also more difficult to do. They require more skill and experience. To make a full penetration weld, you'll need to bevel the edges of the pipe and the flange. This creates a V-shaped groove that allows the weld metal to penetrate fully into the joint. Once the beveling is done, you can use your welding machine to fill the groove with weld metal.
Welding Techniques
Here are some tips to help you get the best results when welding Slip On Flanges:
- Use the Right Welding Parameters: Make sure you set the welding machine to the correct voltage, amperage, and wire feed speed for the type of welding you're doing. This will help ensure a good weld and prevent any problems.
- Keep the Welding Arc Short: A short welding arc helps keep the heat concentrated and reduces the risk of overheating the work surface.
- Weld in Sections: If the flange is large, it's a good idea to weld it in sections. This helps prevent warping and distortion of the flange and the pipe.
- Let the Weld Cool Slowly: After you've finished welding, let the weld cool slowly. This helps prevent cracking and ensures a strong, durable weld.
Inspecting the Weld
Once the weld has cooled, it's important to inspect it for any defects. Look for cracks, porosity, or incomplete fusion. You can use a magnifying glass or a non-destructive testing method, such as ultrasonic testing or X-ray testing, to check the quality of the weld. If you find any defects, you'll need to repair them before using the pipe and flange assembly.
Post-Weld Treatment
After the weld has been inspected and approved, you may need to do some post-weld treatment. This can include cleaning the weld area to remove any slag or spatter, and applying a protective coating to prevent corrosion.
Conclusion
Welding a Slip On Flange to a pipe is a relatively straightforward process, but it does require some skill and attention to detail. By following the steps outlined in this blog, you can ensure a strong, reliable connection that will last for years.


If you're in the market for Slip On Flanges or have any questions about the welding process, don't hesitate to reach out. We're here to help you find the right products for your needs and provide you with the support you need to get the job done right. Whether you're working on a small DIY project or a large industrial application, we've got you covered.
References
- American Welding Society (AWS) Standards
- Welding Handbook, Volume 1: Welding Science and Technology